Ini adalah catatan tambahan dari Part #2. Install & Konfigurasi SSL VPN Client Windows, dimana Sophos SSL VPN Client sudah berakhir di tanggal 31 Januari 2022 dan di gantikan dengan Sophos Connect Client, berikut berita resminya;
With the launch of the new and greatly improved Sophos Connect v2 VPN client over a year ago, we are announcing the End-of-Life (EoL) of the old Sophos SSL VPN Client for Windows. The EoL of the old SSL VPN Client will be effective on 31 January 2022.
Sophos SSL VPN clients will continue to function but new client installs are encouraged to use Sophos Connect and existing deployments are recommended to migrate as soon as possible.
Sophos Connect v2 is our new and greatly enhanced VPN client that works with both Sophos (XG) Firewall and Sophos (SG) UTM.
Dari berita tersebut menyatakan bahwa Sophos SSL VPN Client akan tetap berfungsi namun disarankan untuk segara dimigrasikan ke Sophos Connect dengan catatan firmware Sophos XG Firewall kalian sudah v18. Oke lah kalau begitu, tanpa basa-basi lagi, langsung saja mari kita mulai...
2.1. Install & Konfigurasi SSL VPN Client Windows dengan Sophos Connect
2.1.1. Login ke Sophos User Portal dengan user it.staff ⇒ VPN ⇒ Sophos Connect client (IPsec and SSL VPN) 'Download client for Windows' & SSL VPN client 'Download configuration for other OSs'
2.1.2. Installing the Sophos Connect client software on Windows
- Buka folder Downloads dan cari file sophosconnect_installer.zip, kalian bisa Extract terlebih dahulu atau langsung buka saja file tersebut ⇒ double click SophosConnect_2.1.20_(IPsec_and_SSLVPN) untuk menginstallnya
- Muncul kotak dialog Sophos Connect installer Sophos End User Terms of Use and Privacy Notice ⇒ I accept the Sophos End User Terms of Use and acknowledge the Sophos Privacy Nitice: checked ⇒ Install
- Muncul kotak dialog '66e6664.msi' Verified publisher: Sophos Ltd ⇒ Yes
- Tunggu saja sampai proses instalasi selesai
- Completed the Sophos Connect installer ⇒ Finish
2.1.3. Start & connect Sophos Connect client
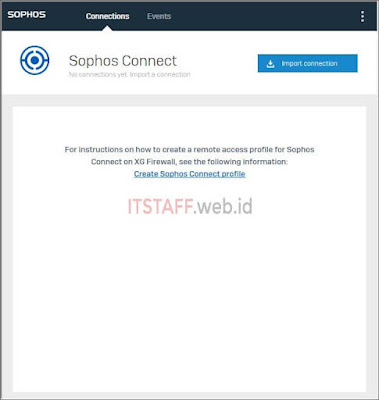
- Sekarang buka Sophos Connect, lalu klik Import connection ⇒ cari file konfigurasinya di folder Download ⇒ Open
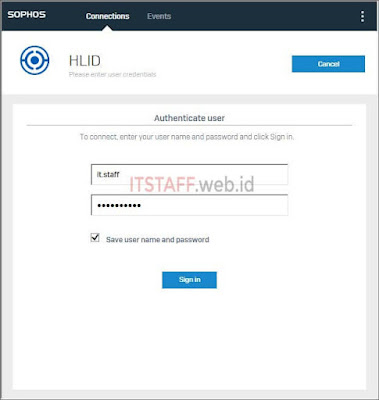
- Jika sudah, sekarang klik Connect dan login menggunakan Username: it.staff beserta passwordnya, Save user name and password: checked ⇒ Sign in
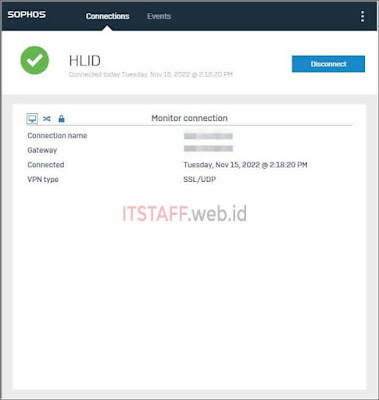
- Tunggu sampai status Connection established
Sekarang coba test ping ke IP JKTFA01 dan IP JKTFS01 dari laptop tersebut untuk memastikan koneksi SSL VPN ini berjalan normal. Jika masih Request time out, silahkan cek Rules and Policies Firewall (VPN to LAN) serta cek konfigurasi Default Certificate Authorities (CA) Sophos XG Firewall.
Part #2. Install & Konfigurasi SSL VPN Client Windows
Part #2.1. Install & Konfigurasi SSL VPN Client Windows Sophos Connect
Part #3. Install & Konfigurasi SSL VPN Client Mac OS X
Part #4. Install & Konfigurasi SSL VPN Client Android
Part #5. Install & Konfigurasi SSL VPN Client iPhone/iPad
Itu saja yang saya lakukan untuk membuat koneksi SSL VPN Remote Access di Sophos XG210 dengan Sophos Connect client Windows 10, konfigurasi di atas bisa juga diterapkan pada Sophos XG Firewall Series dengan firmware v18 serta laptop dengan Windows operating system. Semoga catatan ini bisa berguna untuk saya dan kalian yang membacanya.


